
Some links here are affiliate links. If you buy through them, this site earns a small commission — the recipes are unaffected. Read more →
Brown butter is one of the simplest ways to give your baking a deeper, toastier, and more complex flavor. In just a few minutes, ordinary melted butter transforms into something fragrant and nutty, with notes of toasted nuts, caramel, and butterscotch. It’s a small extra step, but it can completely change the character of your baking, adding depth to simple cookies, cakes, tarts, and pastries without making the recipe more complicated.
In this guide, I’ll show you how to brown butter step by step without burning it. I’ll discuss what color to look for, from golden beurre noisette to mahogany beurre noir. I’ll share my experience with how much brown butter a given quantity of butter yields. And explain how to substitute it in baking recipes that call for melted, softened, or cold butter.
Brown Butter in Brief
- What you’ll learn: When to stop, what color to aim for (from golden beurre noisette to mahogany beurre noir), expected yield loss (15-20% from evaporated water), and how to substitute brown butter in recipes calling for melted, cold, or softened butter.
- Key technique tip: Use a light-colored pan over medium heat and start stirring with a heatproof spatula once the foam forms. Both let you watch the milk solids and stop before they burn.
- Common pitfall: Carryover cooking is real. Pour the finished butter into a heatproof container the moment it hits the color you want, before the residual pan heat takes it past.
- When to use it: Best in recipes where butter is a main flavor: pound cakes, financiers, brown-butter cookies, shortbread. And pairs especially well with vanilla, brown sugar, rye flour, chocolate, and toasted nuts.
What Is Brown Butter?
Brown butter is the result of heating butter until the water cooks off and the milk solids toast to a golden brown. In less than 10 minutes, the butter takes on irresistible nutty and caramel notes that add depth to any dish. It’s a classic technique for both cooking and baking used by the French since the Middle Ages (McGee). For this guide, I’ll mostly stick to using brown butter in baking.
What Does Brown Butter Taste Like?
Browned butter tastes like regular butter, but with a richer, deeper flavor. When making brown butter, it fills your kitchen with an irresistible butter-and-toasted-nut smell, and that aroma will come through when you add it to baked goods. Boiling off the water concentrates the butter flavor, while the browning process adds toasted caramel and nutty notes. Brown butter’s deep flavor adds complexity and nuance to your baking.
How to Brown Butter Step by Step
Since this is a technique rather than a fixed recipe, you can brown any amount of butter. I usually start with a convenient everyday amount: a 250g block in Europe, or 8 ounces (2 sticks) in the U.S.
I opt for unsalted butter because different brands vary in salt content, and I prefer to control the salt in my baking. Plus, salted butter tends to foam more during the browning process, making it harder to see how dark the milk solids are.
Cut the butter into uniform pieces, then melt it in a light-colored pan over medium heat. At first, it will sputter while the water boils off.
As it continues to cook, the butter will begin to foam, and the sputtering will quieten down or stop. When the foam forms, start stirring with a heatproof spatula. Stirring clears some of the foam so you can keep an eye on the milk solids as they brown and prevent them from burning.
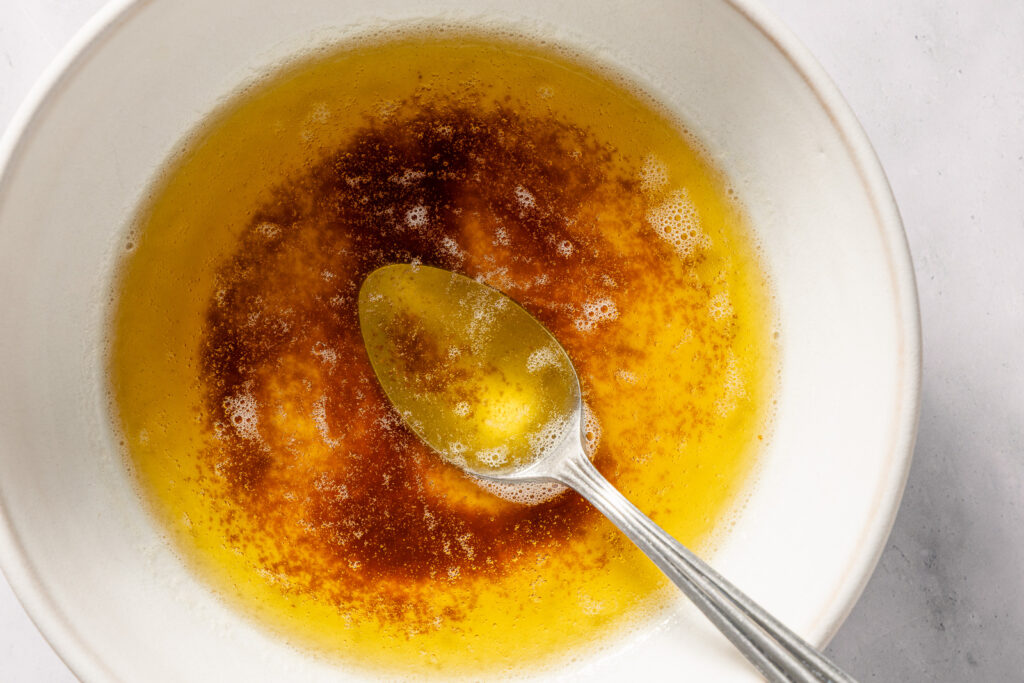
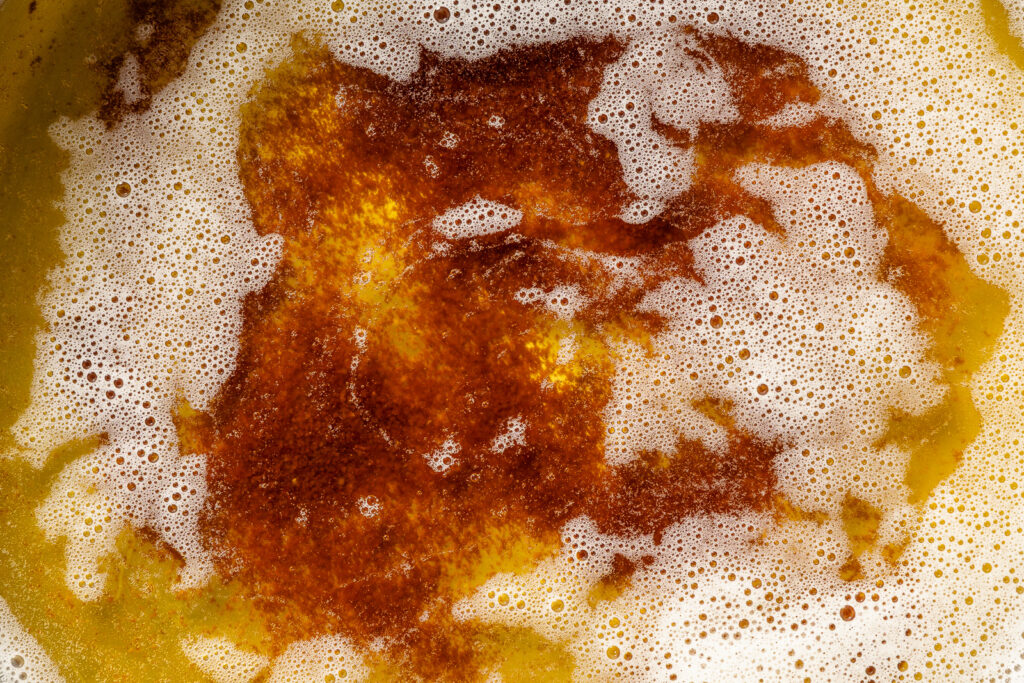
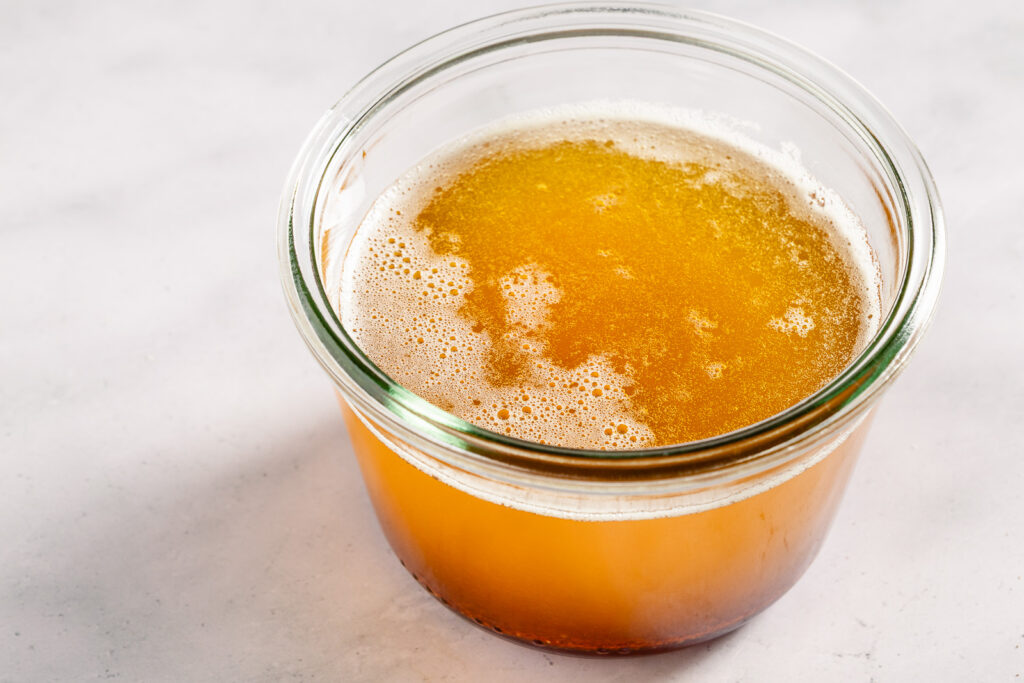
Continue cooking, stirring occasionally. The milk solids will toast to golden specks, then to amber, and finally to dark brown. Once the butter is browned to your liking, remove the pan from the heat. It should smell nutty and toasted, not burnt or sharp.
Even if you stop cooking when it reaches the perfect color, carryover cooking from the hot pan can burn the butter. Pour the butter into a heatproof container to prevent it from cooking further.
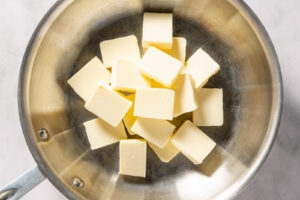
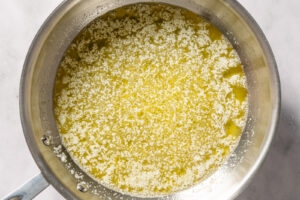
First, melt the butter over medium heat
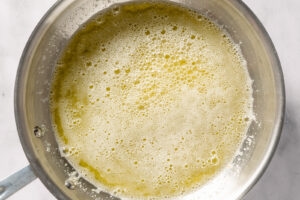
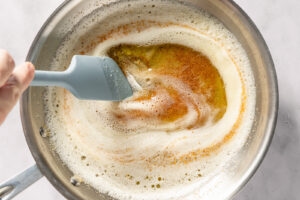
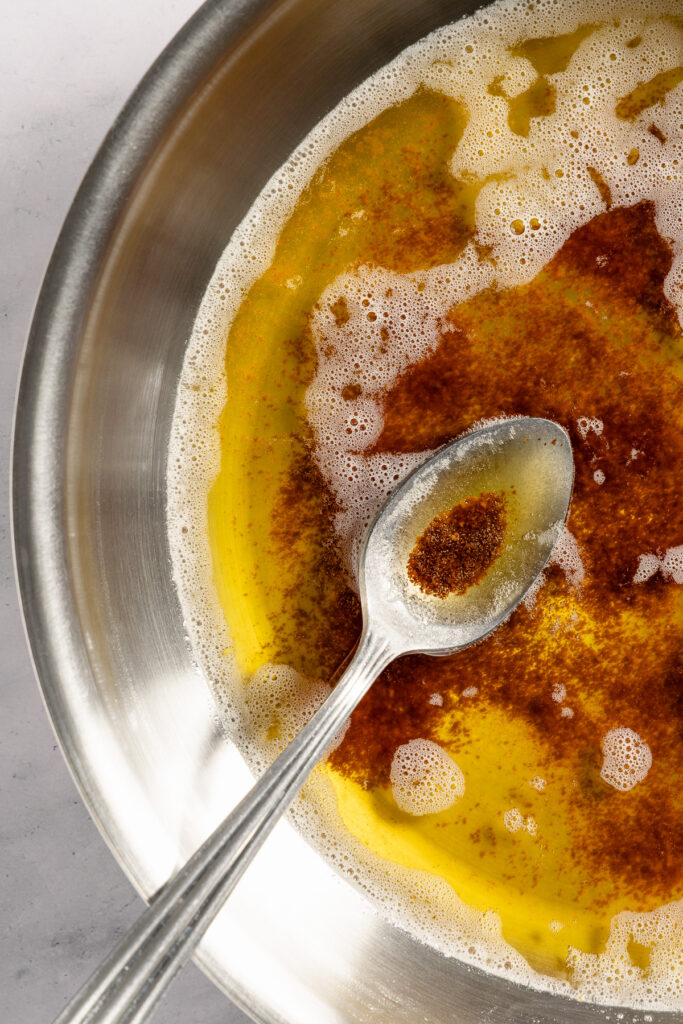
The butter will foam, and then the milk solids will brown
How to Know When Brown Butter Is Done
The whole process will take about 10 minutes, but you’re in charge of determining how dark you’d like to toast the butter. For very subtle nutty notes, leave it blonde. For a versatile, rich flavor, stop at golden brown. And for intense, deeply toasted flavor, cook until the milk solids turn a dark amber.
Beurre Noisette vs Beurre Noir
Beurre noisette, literally hazelnut butter, is cooked until it’s golden brown. This level of browning is the most versatile, as it has all of the nutty flavors developed by the Maillard reaction and limited bitterness.
Beurre noir, or black butter, is a deep mahogany brown. It has a more intense flavor and bitterness that can make it too assertive for many baked goods. It may be called black butter, but it should be dark brown, not black. If the milk solids have turned black, they’re burned and will taste acrid.
My favorite is a dark amber that has more character than a golden beurre noisette, but without taking it as far as a beurre noir.
Behind The Process
As it melts, the butter will separate into its three components: butterfat, water, and milk solids. As the butter continues to cook, the water boils off. You’ll notice it sputter and spurt. When things go silent, the water has evaporated, and the butter will rapidly surpass the water’s boiling point. At these higher temperatures, the amino acids and lactose in the milk solids undergo the Maillard reaction, leading to browning and the development of tantalizing nutty and toasted aromas.
The Maillard reaction is the complex chemical reaction triggered by heat between amino acids and sugars that causes browning and the creation of hundreds of flavor compounds. The Maillard reaction is one of the most, if not the most, important processes in baking and cooking. Anything seared, browned, or toasted (think: bread crust, roasted coffee, chocolate, or roasted meats) gets its enticing color and flavor thanks to the Maillard reaction.
Tips for Browning Butter Without Burning It
- Cut the butter into pieces so it heats evenly.
- Using a light-colored pan allows you to track the color as the butter browns.
- You can use either a saucepan or a sauté pan. A sauté pan, because of the higher surface area, will speed things along. If you’re worried about the butter browning too quickly or burning, use a saucepan instead.
- Using medium heat helps you keep the toasting under control without making the process tediously slow. Browned butter can turn from perfectly golden to black and astringent very quickly, so avoid high heat.
- Once the butter begins to foam, stir with a heatproof spatula. Keeping the butter solids moving encourages even browning, plus the spatula breaks through the foam, so you can see the butter solids to track how dark they are.
Brown Butter Yield and Moisture Loss
Because the water is boiled off when making brown butter, the final weight will be 15-20% less than the quantity you started with. I always brown more butter than the recipe calls for and measure it after browning.
The brand of butter I use comes in 250g blocks. In the most recent batch, after browning, it yielded 207g. That is a loss of 43g, or 17.2%. This amount will vary depending on the butterfat content of the butter you use.
How to Use Brown Butter in Baking
Brown butter adds complexity and nuttiness to almost any baking project: from cookies and cakes, tarts and galettes, to scones and pastries. I find that brown butter works particularly well in recipes that already feature butter as the main flavor. Brown butter pairs well with vanilla, brown sugar, rye flour, chocolate, and toasted nuts. However, I find it can get lost in recipes with many components.
These are a few of my favorite recipes that use brown butter:
- Brown Butter Pound Cake
- Financiers: French Almond Cakes
- Chocolate Chip Cookies with Beurre Noisette, Cinnamon, and Rosemary
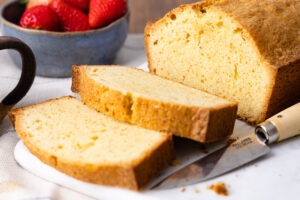
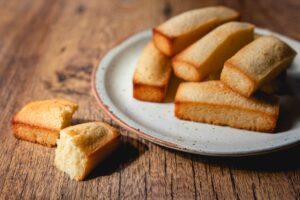
Brown butter pound cake and financiers
How to Substitute Brown Butter for Regular Butter
You can substitute brown butter for regular butter in many baking recipes, but the best method depends on whether the original recipe calls for melted, cold, or room-temperature butter.
- If the original recipe calls for melted butter, you can use brown butter the same way it calls for melted butter.
- If the recipe calls for cold butter, you’ll need to chill it thoroughly first. Then use the cold, re-solidified brown butter as directed in the recipe.
- For recipes that call for softened or room-temperature butter, you’ll first need to refrigerate the brown butter until thoroughly chilled. Then, remove it from the fridge about an hour in advance to let it warm to room temperature.
You may need to adjust the liquid in your recipe to compensate for the water lost to evaporation during simmering. This is important for recipes that are sensitive to moisture, such as cakes or chewy cookies.
You can weigh the butter before and after browning, and then add the difference in water. A rough rule of thumb if you don’t have a kitchen scale is to add 1 tablespoon (15g) of water for every 1/2 cup (1 stick, 113g) of butter.
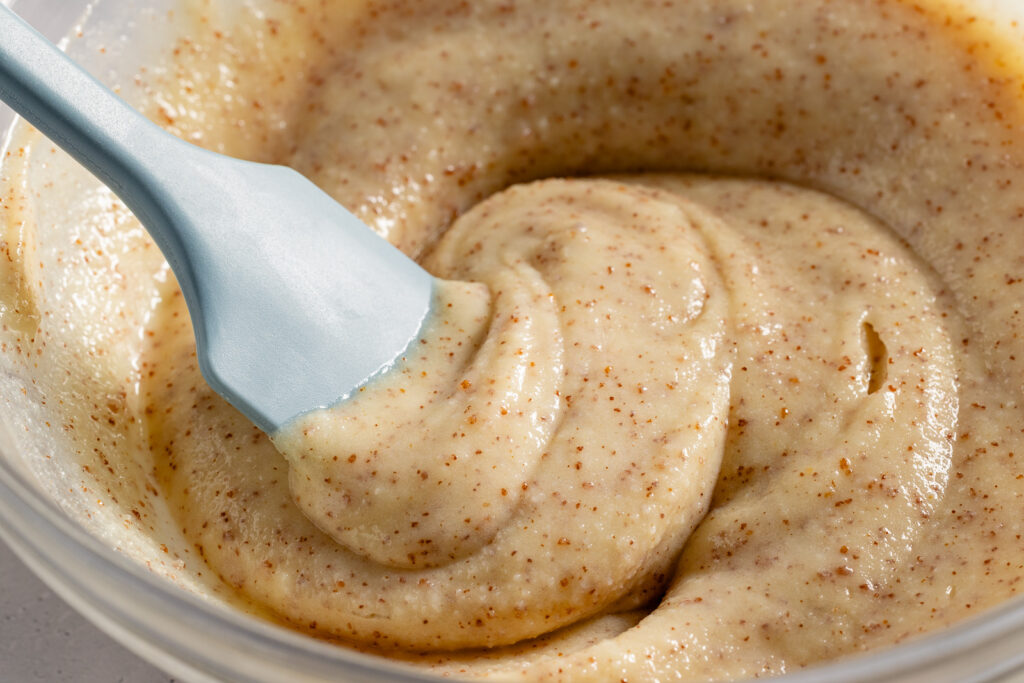
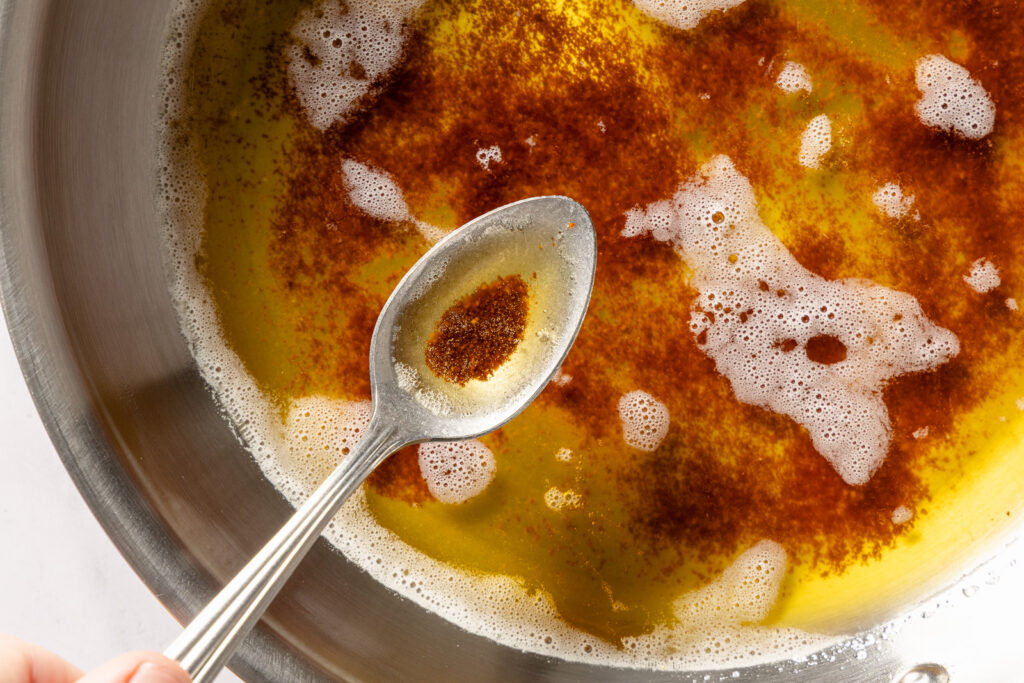
What Are the Brown Flecks?
The flecks are browned milk solids, and they will show up in any lighter-colored baked goods. I like to leave them to take advantage of all their flavor, but some bakers prefer to strain them out.
How to Store and Freeze Brown Butter
Store in a glass jar in the refrigerator for up to a few weeks. Brown butter can be frozen for up to three months.
Frequently Asked Questions
Yes, you can brown salted butter, but I prefer using unsalted butter for baking. Salted butter varies in salt content from brand to brand, which makes it harder to control the final flavor of a recipe. It also tends to foam more as it browns, making it more difficult to see the color of the milk solids. If salted butter is all you have, you can still brown it; just watch it carefully and reduce the added salt in the recipe if needed.
Browning butter usually takes about 5 to 10 minutes, depending on the amount of butter, the size and shape of your pan, and the heat level. A wider pan will brown butter more quickly because more surface area is exposed to heat. Rather than relying solely on time, look for visual and sensory cues: the sputtering will quiet down, the foam will rise, the milk solids will turn golden to amber-brown, and the butter will smell nutty and toasted.
Burned brown butter will smell sharp, bitter, or acrid instead of nutty and toasted. The milk solids may look black rather than golden, amber, or dark brown. Very dark brown butter can be delicious in the right context, but once the solids turn black, the flavor becomes harsh and unpleasant. If the butter smells burnt, it is better to start over.
Yes, especially once the butter begins to foam. Stirring helps move the milk solids around the pan so they brown evenly rather than sticking and scorching in one spot. It also clears some of the foam, making it easier to see the butter’s color as it browns.
No, you do not need to strain brown butter for most baking recipes. The brown flecks are toasted milk solids, and they contain much of the nutty, caramelized flavor that makes brown butter so good. Some bakers strain them out for a smoother appearance or a more delicate flavor, but I usually leave them in.
Yes, brown butter is easy to make ahead. Once browned, pour it into a heatproof container and let it cool. Store it in the refrigerator for up to a few weeks, or freeze it for up to three months. If you need softened brown butter for a recipe, chill it until solid, then let it sit at room temperature until it reaches the right consistency.
You can use brown butter in many baking recipes, but it is not always a direct one-to-one substitution. It works especially well in recipes where butter is a major flavor, such as cookies, pound cakes, financiers, blondies, tarts, and shortbread. For recipes that rely on a specific butter texture, such as cold butter for pastry or softened butter for creaming, chill the brown butter until solid before using it.
Sometimes. Since browning butter cooks off water, the final weight is lower than the amount of butter you started with. In moisture-sensitive recipes, such as cakes or chewy cookies, this can affect the texture. For the most accurate result, weigh the butter before and after browning, then add back the difference in water. As a general rule, add about 1 tablespoon of water for every 1/2 cup or 1 stick of butter that has been browned.
Sources
Want a Deeper Dive? Here’s a list of some of the sources I used to write this article:
Harold McGee, On Food and Cooking
Paula Figoni, How Baking Works
Nicola Lamb, Sift

Leave a Reply