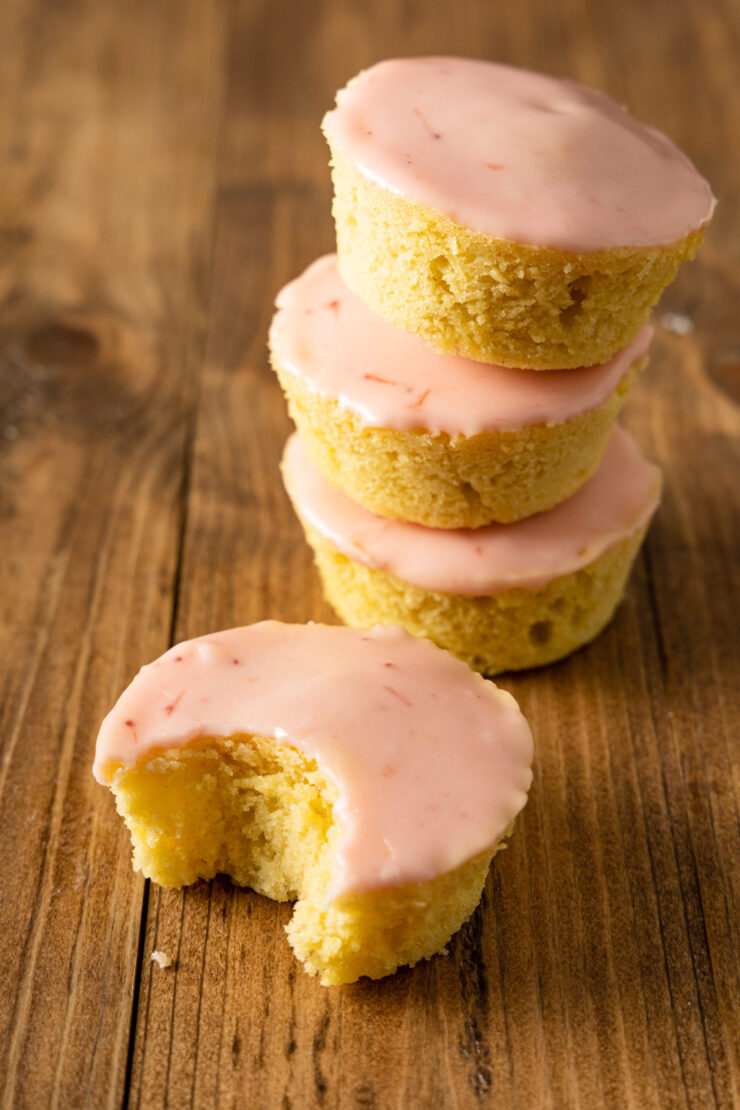
Roze koeken, literally “pink cakes,” are little cakes found in Dutch supermarkets, comparable to how many Americans grew up with Little Debbie’s. They’re simple, dense pound cakes similar to black and white cookies but with a pink glaze on top.
The recipe here is a home-baked version slightly different from what you might find at a Dutch supermarket. They’re made with real butter, flavored with bright lemon zest, and glazed with a raspberry icing. Purists may argue that they’re not quite roze koeken, but I think they’re a bit of an upgrade from the packaged ones.
Variations for the Icing
Because roze koeken are usually packaged sweets from the grocery store, the “traditional” icing is much different from the recipe here, with food dyes and artificial ingredients. I’d rather flavor the icing with something naturally red or pink than use food coloring.
I love the tart pairing of lemon and raspberry, but you could make an icing using pomegranate juice, strawberry or raspberry purée instead of jam, or strawberry jam.
To celebrate Koningsdag, you’ll often see the cakes with an orange glaze, which you can make by using carrot juice for the icing. For these, I might switch the lemon zest and juice for orange.
Tips for Making Roze Koek
Simplicity is one of the winning qualities of roze koeken. There are a few things to pay attention to while making them though, to ensure they come out their best.
- Use room temperature butter and eggs. The batter will not mix correctly if either of these ingredients is cold.
- Cream the butter and sugar together for the entire 3 minutes, at least. These cakes have no leavening, helping them to bake even and flat. But that doesn’t mean they should be too dense. Beating the butter and sugar ensures the batter is aerated and makes for a fluffy cake.
- Add the eggs one at a time, and wait until it’s completely incorporated before adding the next egg. Scrape the bottom and sides of the bowl between additions. If you add the eggs too quickly, the batter can curdle. If this happens, add a couple of tablespoons of the flour mixture and continue mixing.
- I like to switch to a rubber spatula and gently fold in the flour. It’s not completely necessary, but it helps me prevent over-mixing the batter, which would make the cakes tough.
- Cover the muffin pan with a baking sheet for the first 10 minutes of baking. Covering the cakes prevents them from doming, and they stay nice and flat for easy and even glazing later.
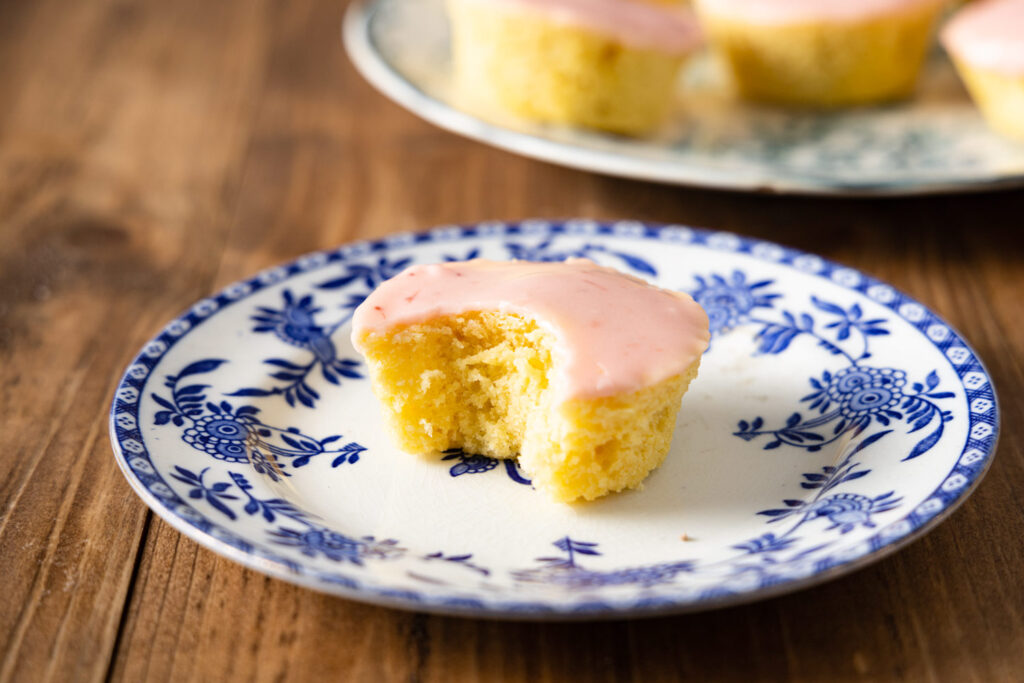
- Let the cakes cool completely before icing them. If the cakes are warm, the icing will melt, run down the sides of the cakes, and soak in rather than glazing the top.
- Let the glaze set; it may take about an hour at room temperature. If you want the glaze to set faster, you can place them in the fridge.
Roze Koeken: Dutch Pink Cakes
Ingredients:
Yields 12 cakes
150g plain flour (1 ¼ cups)
2 Tablespoons corn flour
170g unsalted butter, room temperature
150g granulated sugar
1/4 teaspoon salt
Zest of 1 lemon
3 large eggs, room temperature
1 teaspoon vanilla extract
RASPBERRY ICING:
120g icing sugar
20ml lemon juice
1 tablespoon raspberry jam
1 1/4 cups all-purpose flour
2 Tablespoons cornstarch
3/4 cup unsalted butter, room temperature
3/4 cup granulated sugar
1/4 teaspoon salt
Zest of 1 lemon
3 large eggs, room temperature
1 teaspoon vanilla extract
RASPBERRY ICING:
1 cup confectioners’ sugar
1 1/2 Tablespoons lemon juice
1 Tablespoon raspberry jam
1. Preheat the oven:
Set an oven rack at the middle position and preheat the oven to 175°C (350°F).
2. Prepare the pan:
Grease a standard muffin pan generously with butter and dust with flour. Tap out the excess flour and set it aside.
3. Mix the dry ingredients:
Whisk together the flour and cornstarch in a small mixing bowl.
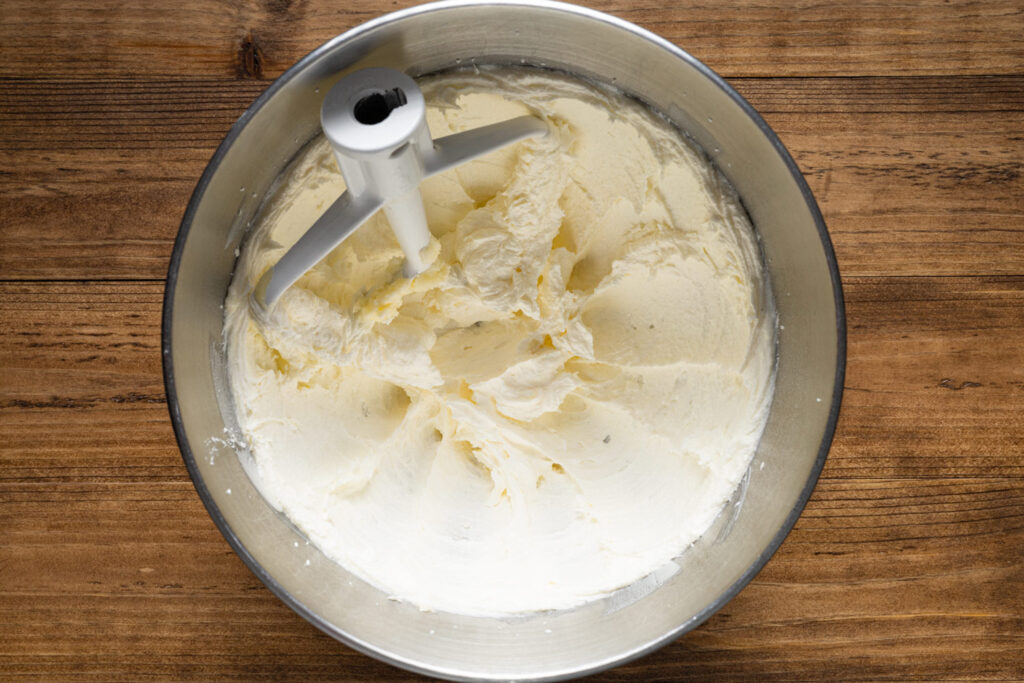
4. Cream the butter and sugar:
In the bowl of a stand mixer fitted with the paddle attachment, or a large mixing bowl with a hand mixer, beat the butter, sugar, salt, and lemon zest until pale and fluffy, about 3 minutes.
5. Add the eggs:
Add the eggs, one at a time, beating until fully combined before adding the next. Pause and scrape the sides of the bowl with a spatula between additions.
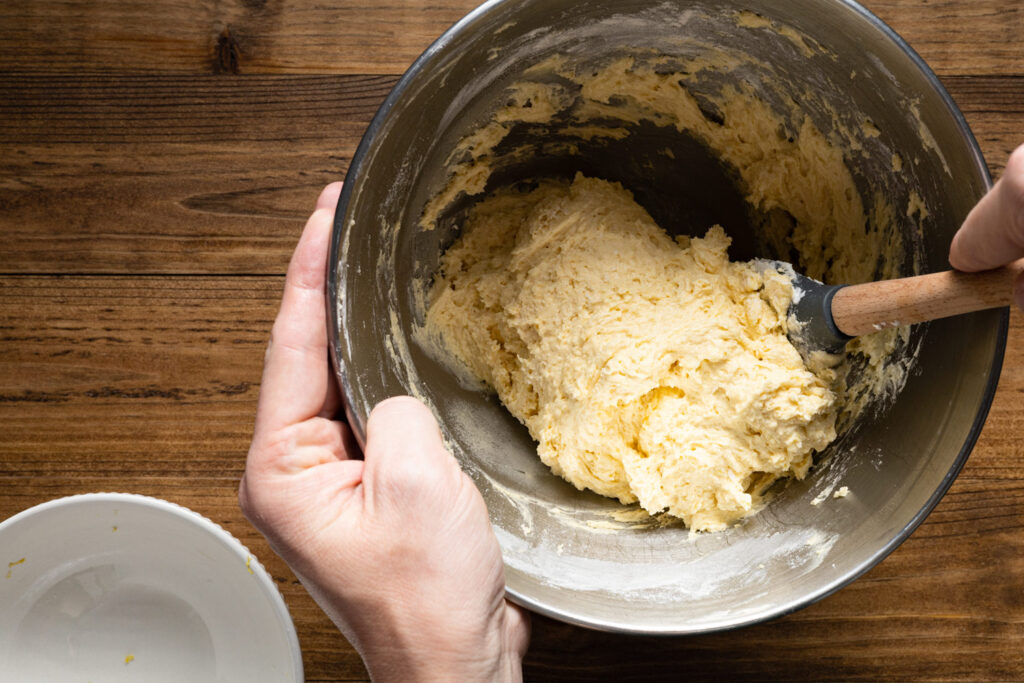
6. Add the flour mixture:
Gently fold in the flour mixture by hand with a rubber spatula in 2 additions. Stop mixing as soon as the batter is combined and no dry streaks of flour remain. The batter will be thick.
7. Bake:
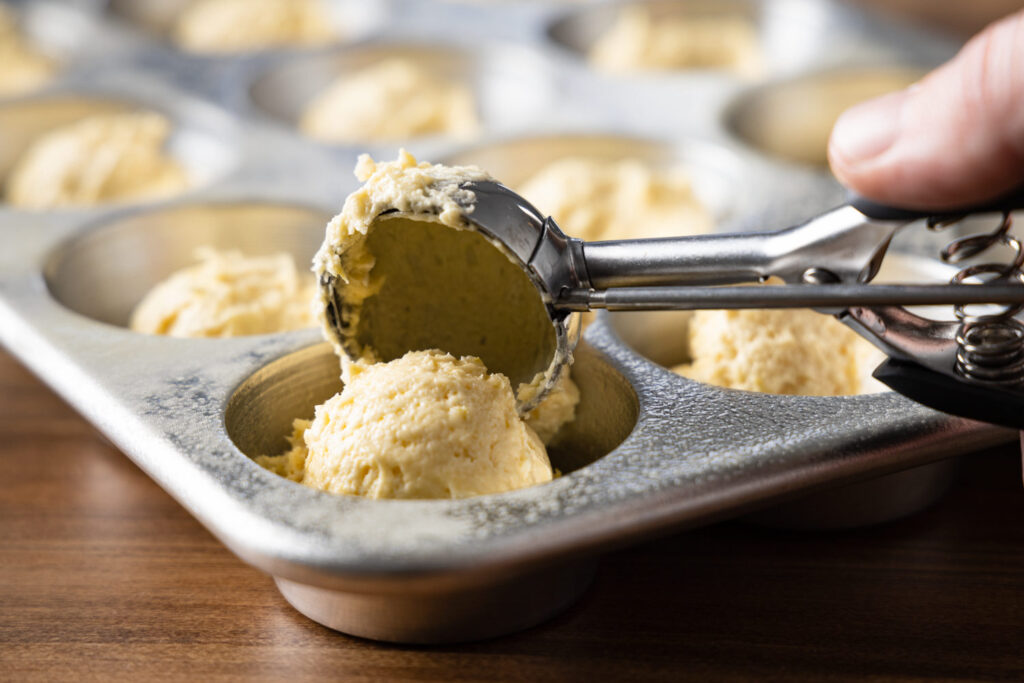
Divide the batter equally among the cups of the greased muffin pan. My favorite tool for this is a cookie scoop or retractable ice cream scoop, but you could also use two spoons.
Cover the filled muffin pan with a baking sheet. Covering the pan during baking ensures even, flat cakes that are easy to glaze by preventing the cakes from rising and doming in the middle.
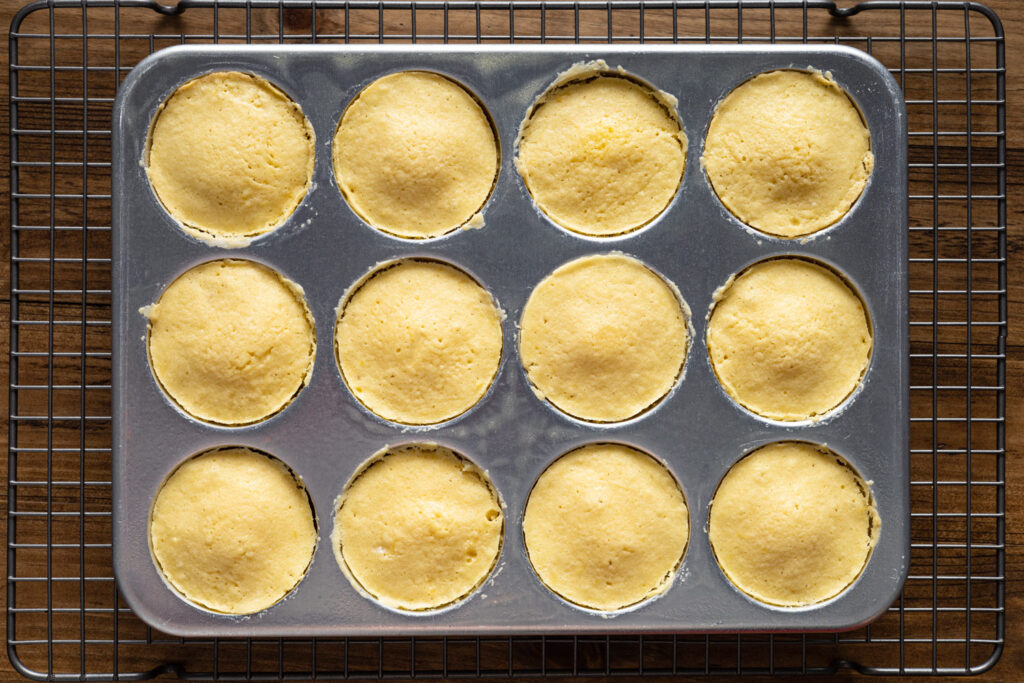
Bake the cakes at 175°C (350°F) for 10 minutes, remove the baking sheet from the top of the pan and continue baking for a further 5 to 10 minutes, or until a skewer inserted into the center of one of the cakes comes out clean.
8. Cool:
Remove the pan from the oven and let the cakes cool in the pan for 5 minutes. Use a small offset spatula or a butter knife to gently pry the cakes free from the pan and set them on a wire rack to cool completely.
9. Make the icing:
Once the cakes are cool, make the icing. In a small mixing bowl, whisk together the powdered sugar, lemon juice, and raspberry jam until a smooth, thick icing forms. It should be nearly as thick as natural peanut butter. But if it’s too thick, thin it with some more lemon juice, just a teaspoon at a time. It’s much easier to thin the icing than to try to thicken it back up.
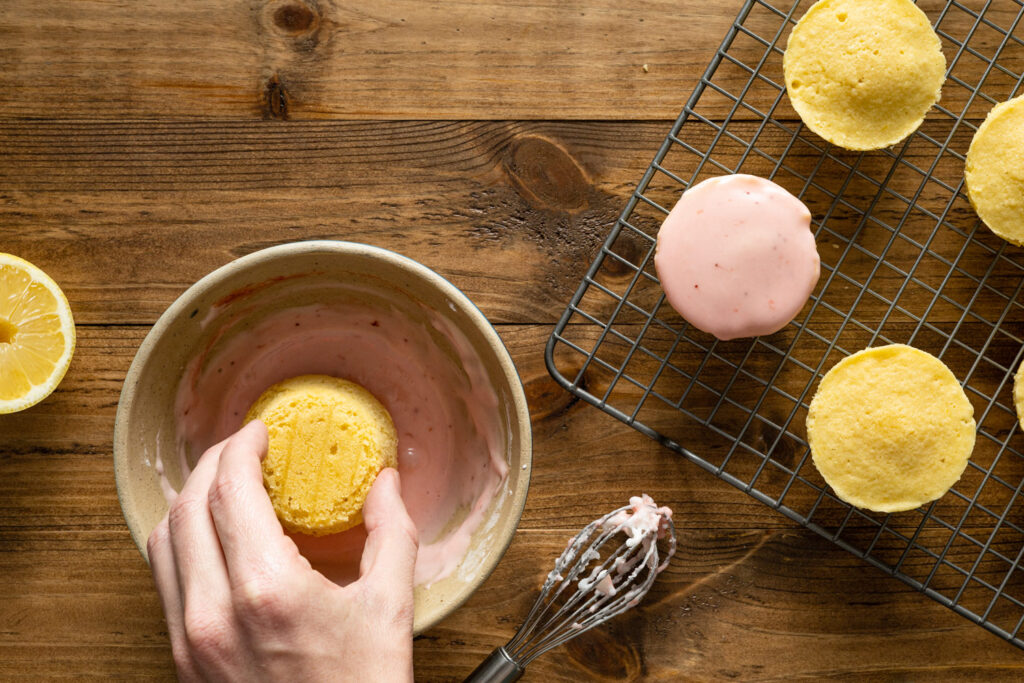
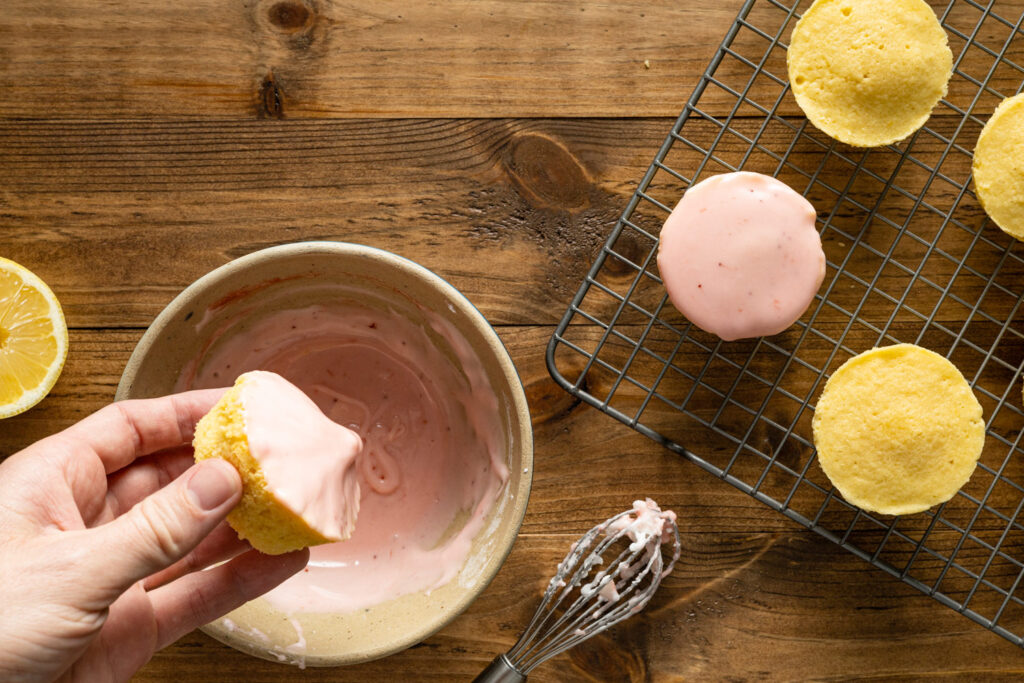
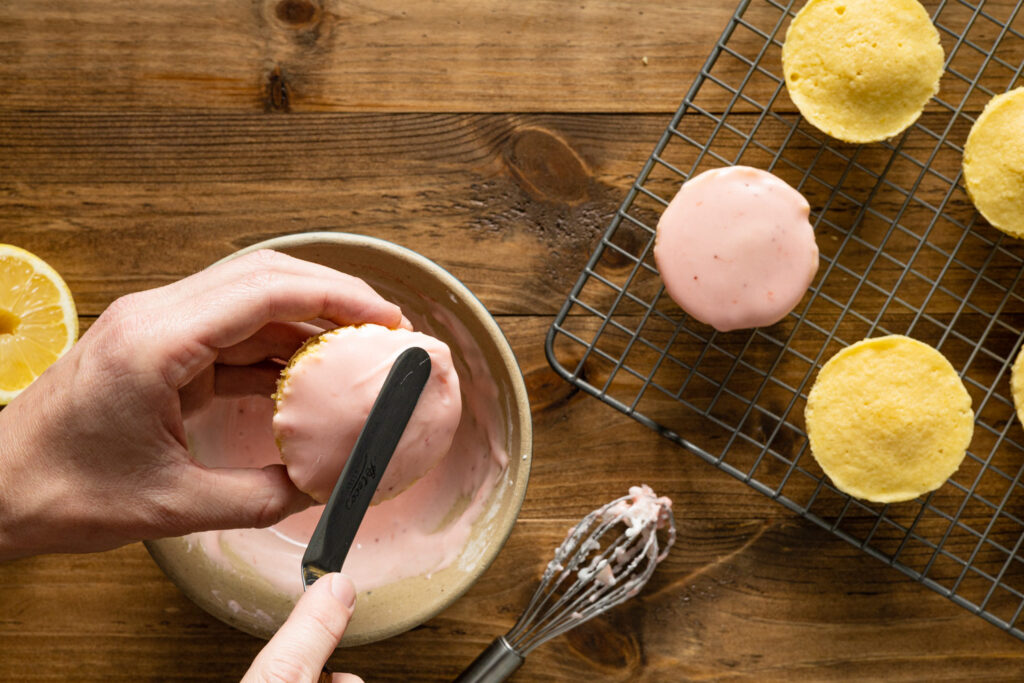
10. Ice the cakes:
To glaze, dip the tops of the cakes into the icing. Swirl the cake to ensure full coverage and continue swirling as you lift and tilt the cake out of the bowl. Let the excess icing drizzle off into the bowl without running down the sides of the cake. You can touch up the finish with an offset spatula if desired.
If you’re worried about tearing the delicate cakes while dipping them in the icing, you can spread the icing on with an offset spatula instead.
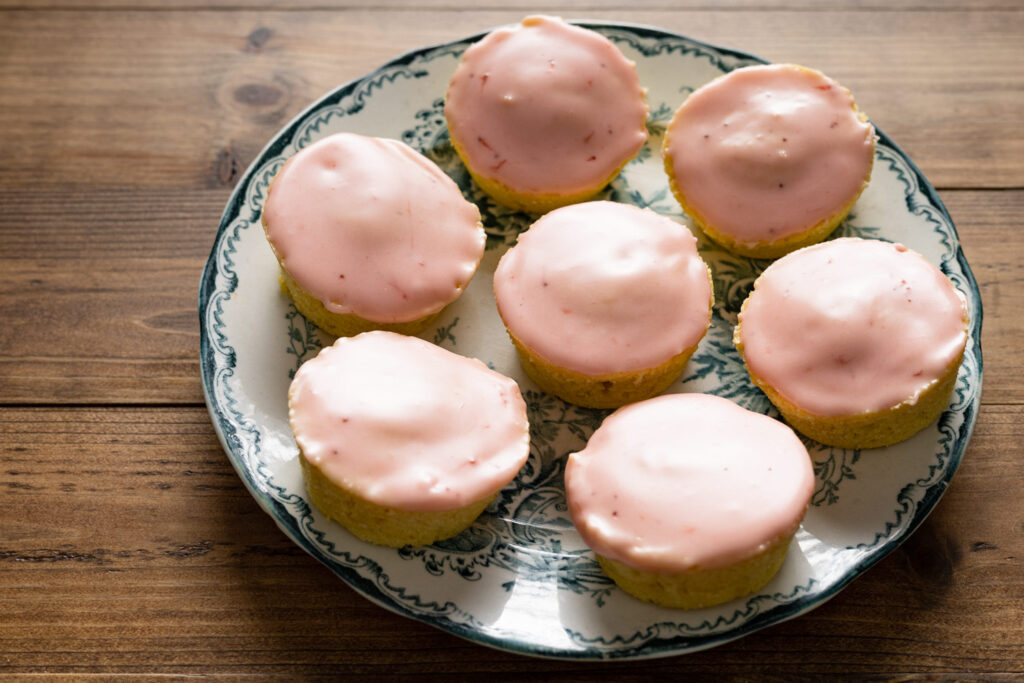
11. Set the icing:
Place the glazed cakes back onto the wire rack and let the icing set before serving. If you’re in a rush, the icing will set faster in the refrigerator.
Storage:
Store the cakes airtight at room temperature for up to 3 days.

No Comments